
.png)
…post-processing fun 🙂
It didn’t take long to learn the key to quick and efficient editing. Getting it right IN CAMERA! But lets face it…it doesn’t always happen that way. Like when you have 7 minutes to throw your kids in a field and start snapping away…all while praying you get ONE good shot for your Christmas card 😉 I have spent the last two years fine tuning my editing process. I have a few presets that I use once in a blue moon. Even when using those, they are tweaked to my own liking. I was not going to allow myself to jump straight to the easy road by purchasing a bunch of actions and presets. Trust me, its difficult not to! I love seeing the beautiful transformation from SOOC (straight out of camera…for future reference) to finished product, all with one simple click of the mouse! Check out www.florabellacollection.com to see some of my favorites. I vowed to understand the basics of editing…burning, dodging, highlights, saturation, clarity, exposure…to name a few! I’m proud of where I’ve come with my editing and cringe when I look at my earlier work 😉 This year I may purchase and dabble in a few of my favorite actions to speed up workflow a bit. We’ll see 🙂
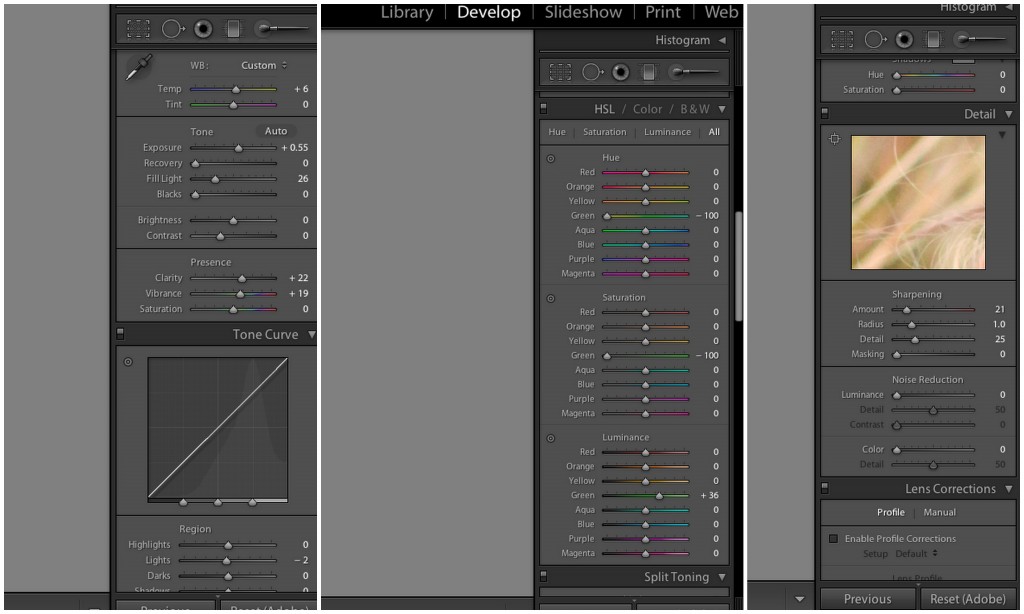
Now back to my basics…I do 90% of my editing in Lightroom 3. I download and cull in Picasa then import to Lightroom
2012 Christmas card photo SOOC
A little underexposed, and all around blah…BUT I saw the potential 😉
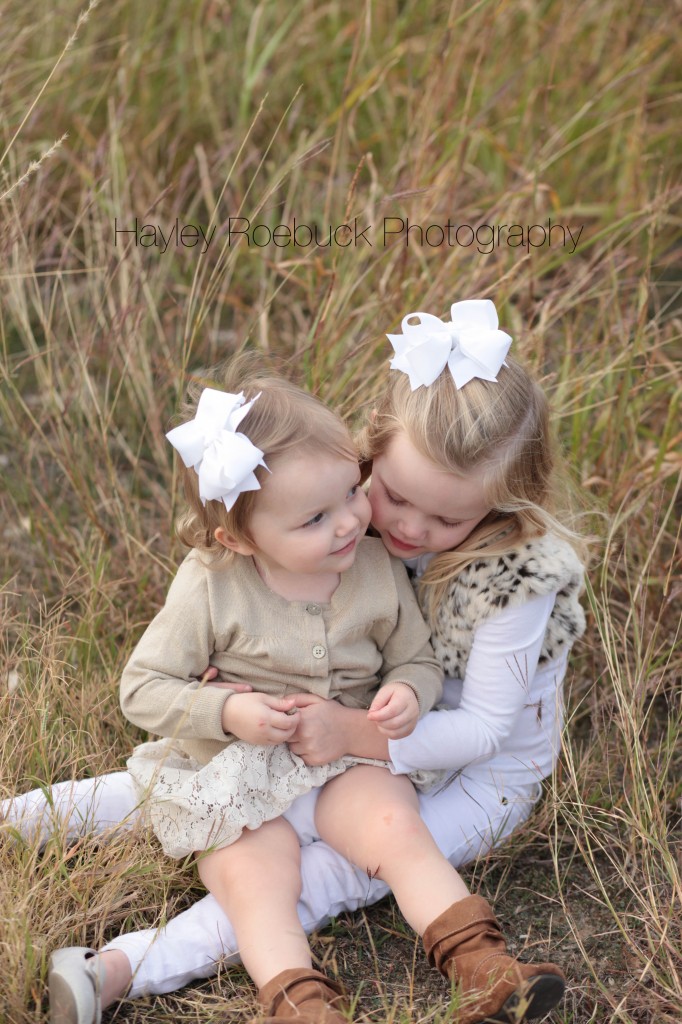
I decided to crop in a bit. As much as I love those little boots, I didn’t want all of Emma’s bare legs and the dirt showing. I also wanted the main focus on their connection. I love the way Elly is pulling Em in close, cheek to cheek.
Look close at Emma’s leg. I didn’t want to crop in anymore so I used the clone tool (set on heal) to clone the lace skirt onto her bare leg.

There are a few sliders that I ALWAYS utilize. Clarity, sharpening and usually vibrance. I wanted more of a warm, yellow tone. You can see where I messed with the greens on the color sliders. There was quite a bit of green in the grass. I didn’t want that to ‘pop’ as much as it was. I also bumped up my exposure and fill light quite a bit. As I stated earlier, this picture was a bit underexposed from the start.
With a few more tweaks and skin softening, I was pleased with my finished product. Our card turned out beautifully and I even ordered a few prints for Christmas gifts 🙂
![]()
Before and after…
![]()
I hope you enjoyed my first ‘how to’ post! I’ve gained so much knowledge from others’ similar posts…I thought I’d share one of my own.
Happy editing!


Christine McKeel - Beautiful shot. Thanks for sharing.